
Tagged: nautilus actions configuration
How to fix low-volume audio/video files with FFMPEG (for normalization) and/or Audacity (for Dynamic Range Compression)
Because my Internet connection is very cranky, I download online videos and play them offline on my WDTV media player. The WDTV remote does not have volume control. After I installed the wdlxtv open-source firmware, it has lost function of the Mute button. Now, there is no way to increase or decrease the volume without getting up from the chair.
Different videos have different volume levels. I wrote a Nautilus Action Configuration and a bash script to normalize audio and video files before I copied them to WDTV.
# Detect the max volume from this command
ffmpeg -y -i "$1/$2" -af "volumedetect" -an -vn -y -f null /dev/null

# Re-encode audio with this command after setting the DB level and output file name
ffmpeg -y -i "$1/$2" -af "volume=`echo $sDBLevel`dB" -c:a libmp3lame -b:a 128k "$sOutputFileName"
This worked fine for most files. Some video files continued to have low volume even though they were already normalized and couldn’t be normalized further. I then learned that this required the use of something called Dynamic Range Compression (DRC). DRC tries retains the waveform structure of the audio stream but compresses them against a threshold. Unfortunately, I compiled my FFMPEG binaries in 2013 and it did not seem to have filters for DRC. I cannot compile the latest FFMPEG source code because my Linux system is from 2010.
Instead, I choose the Dynamic Range Compressor option in Audacity. You load an audio file, select Compression from the Effects menu, adjust the settings and click OK to compress the audio and export it to a new MP3 file. This step couldn’t be automated.
I then used FFMPEG to replace the low-volume audio stream in the video with the compressed audio file generated by Audacity. In the FFMPEG command, I used to -i operators for two input files – the original video file and the new compressed audio file. I used the -map operator to copy the first stream of the first input file and the 3rd stream from the second input file to create a new video file. The second stream containing low-volume audio is dropped.
# Identify the streams in the input files
ffmpeg -i How_Low_Can_I_Go.mp4 -i "How_Low_Can_I_Go[COMPRESSED].mp3"

# Copy the video stream (0:0) without reencoding, drop
# the second stream (0:1), use the third stream (1:0) for audio
ffmpeg -i How_Low_Can_I_Go.mp4 -i "How_Low_Can_I_Go[COMPRESSED].mp3" \
    -map 0:0 -map 1:0 \
    -vcodec copy -acodec copy \
    how-normal-it-is-now.mp4
Thanks:
- The test video is from Jerome Weiselberry who reviews books and films at:
https://www.youtube.com/channel/UCJvJCzJmBZRhjAddBliYBZQ - WDLXTV – http://forum.wdlxtv.com/
- The test audio is from a Microsoft ad for a Surface computer. It features some really freaky-looking kids.
Convert any video to AMV format using ffmpeg – For use with Chinese MP4 players
Yes, really AMV format – the bane of many Chinese portable media players… Using Nautilus Actions Configuration, FFMEG, FFMPEG AMV Codec Tools
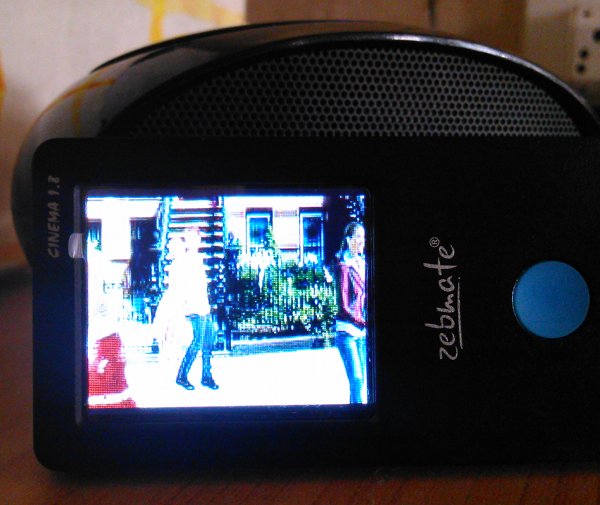
Sometime last year, I needed a tough portable media player that I could use with my electronic projects. I bought the Zebronics Zebmate Cinema 1.8 player thinking that I was getting 8 GB space and video playing ability for Rs. 1600. The touchscreen is resistive, not capacitative, but that exactly fits my needs. Ordinary users will not like the player and should steer clear of this device. The menu interface is difficult.
It will play videos in only one format – AMV. No video converter that I have in Linux and Windows supports this format. On my Linux system, I have a custom-compiled ffmpeg installation that I thought covered everything. Surprisingly, it did not support AMV. There was a Google Code project titled “amv-codec-tools” that seemed to tailor-made for my requirement. I installed that but the video that it generated was full of artifacts. I had given up.
Today, I tried several Windoze software but all the video files they generated gave a “Format Error” message. I then decided to give ffmpeg-amv another attempt. Apparently, the guys who coded this tool seem to be all-Windows folk. The video does not accept OGV or other new formats. When I tried converting a WMV file with ffmpeg-amv, it produced a AMV video file that played both on Linux and the player without any issues. Totem Media Player does not play AMV but not so with VLC. VLC plays everything.
Here is how you convert any video file to AMV in Linux:
- Compile and install FFMPEG as per the guide at https://trac.ffmpeg.org/wiki/UbuntuCompilationGuide
- Install amv-codec-tools from https://github.com/vsubhash/amv-ffmpeg
- Use your regular FFMPEG executable to convert your existing videos (be they FLVs or MP4s) to WMV.
ffmpeg -i "to-be-converted.mp4" -vcodec msmpeg4 -qscale 1 -r:v 16 -s 160x120 -acodec wmav2 wmv-converted.wmv
- Use ffmpeg-amv to convert the resultant WMV file to AMV format
ffmpeg-amv -i "wmv-converted.wmv" -f amv -r 16 -ac 1 -ar 22050 -qmin 3 -qmax 3 converted.amv

UPDATE: I then wrote a Nautilus Actions Configuration. That way, I can just right-click any video file and then convert it to AMV. I use two BASH scripts so that I can monitor the conversion process in a Terminal window. The first bash script opens the terminal window and executes the second bash script inside it. The script converts the file first to WMV and then converts the WMV file to AMV format. After this conversion, the script deletes the WMV file leaving only the AMV file on the desktop.
amv-convert-na.txt
gnome-terminal -x sh -c "bash $HOME/Scripts/amv-convert.txt ""$1"""
amv-convert.txt
sWMVFile=${2%.*}.wmv
sAMVFile=${sWMVFile%.*}.amv

echo -e "\n\nWAIT: Converting $2 to WMV\n\n"
ffmpeg -i "$1/$2"  -qscale 2 -vcodec msmpeg4 -r:v 16 -s 160x120 -acodec wmav2 "$1/$sWMVFile"
if [ $? -eq 0 ]; then
	echo -e "\n\nWAIT: Converting $sWMVFile to AMV\n\n"
	amv-ffmpeg -i "$1/$sWMVFile" -f amv  -r 16 -ac 1 -ar 22050 -qmin 3 -qmax 3 "$1/$sAMVFile"
	if [ $? -eq 0 ]; then
		espeak "AMV conversion succeeded. Created $sAMVFile"
		echo "\n\nSUCCESS: Converted to $1/$sAMVFile"
		notify-send "AMV conversion" "Converted to $1/$sAMVFile"
		rm "$sWMVFile"
	else
		espeak "AMV conversion failed."
		echo "\n\nFAILURE: Unable to convert $1/$sWMVFile to AMV"
		notify-send "AMV conversion" "Failed to $1/$sWMVFile to AMV"
	fi
else
	espeak "AMV conversion failed."
  echo "\n\nFAILURE: Could not convert $2 to WMV"
  notify-send "AMV conversion" "Failed to convert $1/$2 to WMV"
fi
Use this filter for Caja Actions or Nautilus Actions Configuration: *.3gp;*.asf;*.avi;*.dat;*.flv;*.ogv;*.ogm;*.mov;*.mp4;*.mpg;*.mpeg;*.mp4;*.swf;*.webm;*.wmv

Update (26-10-2018): The amv-ffmpeg converts to an intermediate format if the source video resolution and frame rate is different from that of the AMV container. So, the bash script has been updated to downsize the video in the WMV-creation step. Now, amv-ffmpeg converts directly to AMV. Earlier, the steps were as follows:
ffmpeg -i "to-be-converted.mp4" -qscale 1 -vcodec msmpeg4 -acodec wmav2 wmv-converted.wmv
ffmpeg-amv -i "wmv-converted.wmv" -f amv -s 160x120 -r 16 -ac 1 -ar 22050 -qmin 3 -qmax 3 converted.amv
