
Tagged: ffmpeg
26-page ‘FFMPEG Quick Hacks’ book sample PDF available with full TOC
Full-colour but totally flat
One of the difficulties in writing for a topic like FFMPEG is the vast amount of detail to cover. How much should a writer write about and how much should he leave out? I felt that the book could be as big as a Bible and still not be enough. My approach was to leave out unnecessary technical details and pursue the goals that the reader seeks to achieve. Will my gamble pay off? To help the reader decide on that before buying the book, I have provided a 26-page full-color sample PDF of the book.
- Sample PDF: ffmpeg-quick-hacks-book-sample.pdf (2 MB)
Other things in favour of the book are the neat formatting and page design (not exported from Microsoft Word), rich illustrations and subtle but sophisticated learning cues. By the end of the book, the reader will be confident of reading the documentation and solving problems on his/her own. If this level is reached, then the book’s purpose has been met.
- About: ‘FFMPEG Quick Hacks’ book (www.vsubhash.com)
- Kindle eBook: Rs. 70 in India to $2 in US (prices rounded off by country)
- Videos: ‘FFMPEG Quick Hacks’ book playlist
- FFMPEG intro: Cool FFMPEG Tips and Tricks (from 2016)

My FFMPEG book ‘FFMPEG Quick Hacks’ eBook published – 140-page full-color print-replica for Kindle
Costs from Rs. 70 in India and $2 in US
I discovered FFMPEG many years ago and have often marvelled about its versatility and user-friendliness. It is intriguing that its awesomeness is not so well-known. To change this, I wrote a tip-and-tricks article on FFMPEG some years ago for a magazine. I wrote several blog posts on using FFMPEG too. For my personal use, I had created several Nautilus Action Configuration scripts that automated FFMPEG tasks. When I wanted to write a follow-up article with more FFMPEG tips and tricks, I thought it would be a better idea to publish a book so that all of this knowledge could be found in one place.
In this book, I provide an easy introduction to FFMPEG without going through all the boring confusing technical details. However, I will provide enough information for you to know what needs to be done in situations that FFMPEG users often find themselves in. Those who need in-depth information can check online FFMPEG documentation and media format specifications. This book is for those who need an easy-to-read tutorial and a desk-side ready-reference

Back cover of the book ‘FFMPEG Quick Hacks’
When I started writing this book, I was only planning to write about what I knew of FFMPEG but to make it really worthwhile to the reader I began forcing myself to learn more stuff from the documentation. I ended up with a lot more FFMPEG knowledge now than before.
Ebook Before Paperback
I have asked the Twitter handle @FFMPEG to privately review the book before I publish it as a paperback. @FFMPEG agreed to review the book if it was free. I have told him the book will become free after one year because I want to prove that my FOSS toolchain to create professional quality books is successful. The 140-page FFMPEG book is available as a print-replica Kindle ebook now for $2.
Online FFMPEG Demo Videos
A book can have only pictures. To demonstrate videos, you need to have videos. Here is a online playlist of some videos I created to illustrate the book.
How to composite videos using FFMPEG
Video overlays are not easy but can be done.
I have two videos and I need to place them side-by-side in a new video. The dimensions first video (blob.mp4) was 1280×720. The second video (aoc.mp4) was 406×720.
The compositing was achieved by using a complex filter:
ffmpeg -i blob.mp4 -i aoc.mp4 -filter_complex "[0:v]pad=1686:720:0:[a]; [a][1:v]overlay=1280:0[b]" -map "[b]" -pix_fmt yuv420p aoc-meets-garbage-disposal.mp4
In the first part of the filter, I specified that the first input video (blob.mp4) will have a dimension of 1686×720, where 1686 is the total width of the both videos side-by-side. A map identifier “[a]” is used for this screen canvas. Next, with a semicolon delimiter, the second video is specified as appearing at 1280 pixels from the left edge at 0. (Yes, it begins at zero. I got a stupid “Overlay area … not within the main area … or zero-sized… Failed to configure input pad on Parsed_overlay_1” error when I thought I had to use 1281 as the starting point of the second video.) The overlaid video is then map identified as “[b]”. This map is then encoded to the output video.
Of course, this video does not have audio. So, I extracted the audio from both videos using FFMPEG, mixed them using Audacity (although I could have done it using FFMPEG as well), and slipstreamed the audio to the composite video using FFMPEG.
ffmpeg -i blob.mp4 -vn blob.mp3
ffmpeg -i aoc.mp4 -vn aoc.mp3

#Created garbage.mp3 from blob.mp3 and aoc.mp3 using Audacity

ffmpeg -i aoc-meets-garbage-disposal.mp4 -i garbage.mp3 -codec copy aoc-meets-garbage-disposal-mix.mp4
Alexandria Ocasio-Cortez, the US Congresswoman, lived in New York where garbage disposal machines were banned and people did not buy them even after the ban was lifted. She recently caused worldwide hilarity after posting an ominous video about her discovery of the garbage disposal machine in her sink. She must have at least seen them in movies or TV.
How to compile and build AMV FFMPEG from amv-codec-tools
I ruined my cheap Zebtronics MP4 player by sending high voltage into it. Now, it overheats if I try to play it. I got another one. So, I am using AMV-FFMPEG again.
I had moved the FFMPEG part of the abandoned amv-codec-tools project to GitHub. To compile FFMPEG for AMV format, follow these steps:
git clone https://github.com/vsubhash/amv-ffmpeg.git
cd amv-ffmpeg
./configure
make
The executable will be available in the amv-ffmpeg/bin directory. These binaries will be able to generate AMV files. Do not overwrite the regular ffmpeg binaries.
I have also updated the script I used to convert all sorts of video files to AMV.
How to fix low-volume audio/video files with FFMPEG (for normalization) and/or Audacity (for Dynamic Range Compression)
Because my Internet connection is very cranky, I download online videos and play them offline on my WDTV media player. The WDTV remote does not have volume control. After I installed the wdlxtv open-source firmware, it has lost function of the Mute button. Now, there is no way to increase or decrease the volume without getting up from the chair.
Different videos have different volume levels. I wrote a Nautilus Action Configuration and a bash script to normalize audio and video files before I copied them to WDTV.
# Detect the max volume from this command
ffmpeg -y -i "$1/$2" -af "volumedetect" -an -vn -y -f null /dev/null

# Re-encode audio with this command after setting the DB level and output file name
ffmpeg -y -i "$1/$2" -af "volume=`echo $sDBLevel`dB" -c:a libmp3lame -b:a 128k "$sOutputFileName"
This worked fine for most files. Some video files continued to have low volume even though they were already normalized and couldn’t be normalized further. I then learned that this required the use of something called Dynamic Range Compression (DRC). DRC tries retains the waveform structure of the audio stream but compresses them against a threshold. Unfortunately, I compiled my FFMPEG binaries in 2013 and it did not seem to have filters for DRC. I cannot compile the latest FFMPEG source code because my Linux system is from 2010.
Instead, I choose the Dynamic Range Compressor option in Audacity. You load an audio file, select Compression from the Effects menu, adjust the settings and click OK to compress the audio and export it to a new MP3 file. This step couldn’t be automated.
I then used FFMPEG to replace the low-volume audio stream in the video with the compressed audio file generated by Audacity. In the FFMPEG command, I used to -i operators for two input files – the original video file and the new compressed audio file. I used the -map operator to copy the first stream of the first input file and the 3rd stream from the second input file to create a new video file. The second stream containing low-volume audio is dropped.
# Identify the streams in the input files
ffmpeg -i How_Low_Can_I_Go.mp4 -i "How_Low_Can_I_Go[COMPRESSED].mp3"

# Copy the video stream (0:0) without reencoding, drop
# the second stream (0:1), use the third stream (1:0) for audio
ffmpeg -i How_Low_Can_I_Go.mp4 -i "How_Low_Can_I_Go[COMPRESSED].mp3" \
    -map 0:0 -map 1:0 \
    -vcodec copy -acodec copy \
    how-normal-it-is-now.mp4
Thanks:
- The test video is from Jerome Weiselberry who reviews books and films at:
https://www.youtube.com/channel/UCJvJCzJmBZRhjAddBliYBZQ - WDLXTV – http://forum.wdlxtv.com/
- The test audio is from a Microsoft ad for a Surface computer. It features some really freaky-looking kids.
How to 2-pass custom-encode video files for portable MP4 video players using FFMPEG on Linux
I regularly download videos from YouTube using “Download Youtube video as MP4/FLV” Firefox plugin (https://addons.mozilla.org/en-US/firefox/addon/download-youtube/), as I don’t have time to sit through them. I can watch these videos later when I am traveling. However, my portable media player is the type that cannot play just about any format or any screen size. It requires video files to be of QVGA (320×240) resolution and MP4/WMV format. Video bit rates cannot be more than 1000 kbps. Max audio bit rates are I guess 384 kbps. Max frame rate is 30 per second.
On my computer, I have a full-blown FFMPEG installation that can decode and encode anything to anything. (https://trac.ffmpeg.org/wiki/CompilationGuide) I even have an extra FFMPEG installation that can convert videos to AMV format for those cheap Chinese players. (https://vsubhash.wordpress.com/2014/03/02/how-to-convert-any-video-file-to-amv-using-ffmpeg/)
For converting to the portable video player, here were my requirements:
- do 2-pass conversion
- prompt for video/audio bit rate so that it can match the download file or meet the max supported resolution of the device
- prompt for video size
- prompt for video frame rate
- copy the output file to desktop
- wait after conversion attempt so that any errors can be studied
ffmpeg -i "$1"
read -p "Enter video bitrate " iBitRate
read -p "Enter video framerate " iFrameRate
read -p "Enter video size " iVideoSize
read -p "Enter audio bitrate " iAudioBitrate

sOutputFileName=$(basename "$1")
sOutputFileName=~/Desktop/${sOutputFileName%.*}.mp4
sLogFileName=ffmpeg-`date +%G-%m-%g-%k-%M-%S`
echo $sLogFileName

echo "First pass"
ffmpeg -i "$1" -y -s $iVideoSize -f mp4 -pass 1 -passlogfile "$sLogFileName" -c:v mpeg4 -b:v `echo $iBitRate`k -r:v $iFrameRate -an /dev/null

echo "Second pass...."

ffmpeg -i "$1" -y -s $iVideoSize -f mp4 -pass 2 -passlogfile "$sLogFileName" -c:v mpeg4 -b:v `echo $iBitRate`K -r:v $iFrameRate  -b:a `echo $iAudioBitrate`K  "$sOutputFileName"

rm ~/ffmpeg*.log
read -p "Press Enter to quit" oNothing
The above script resides in a file. I call it via a Nautilus Actions Configuration command. This allows me to right click a downloaded video file and convert it from the context menu. The command opens a Terminal window where I can study the input file’s codecs, frame rate, bit rates, and size.
gnome-terminal -x sh -c "bash ~/c4w.txt ""$1"""
IMPORTANT: Youtube videos have all kinds of characters in their names. Many of these characters are illegal under FAT32 file system used by the video players. Rename the files to avoid problems.
Convert any video to AMV format using ffmpeg – For use with Chinese MP4 players
Yes, really AMV format – the bane of many Chinese portable media players… Using Nautilus Actions Configuration, FFMEG, FFMPEG AMV Codec Tools
Sometime last year, I needed a tough portable media player that I could use with my electronic projects. I bought the Zebronics Zebmate Cinema 1.8 player thinking that I was getting 8 GB space and video playing ability for Rs. 1600. The touchscreen is resistive, not capacitative, but that exactly fits my needs. Ordinary users will not like the player and should steer clear of this device. The menu interface is difficult.
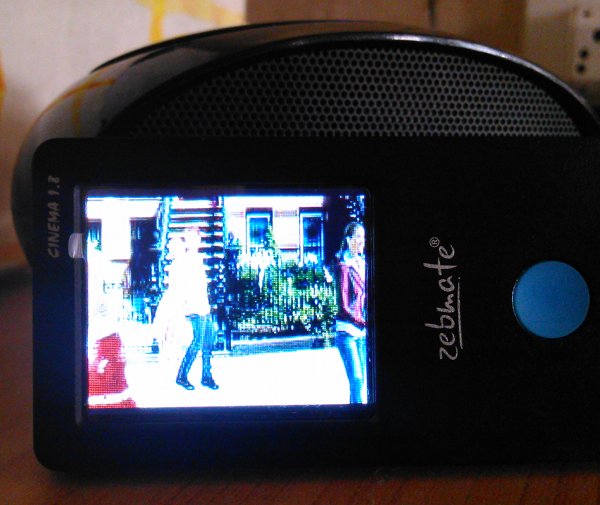
It will play videos in only one format – AMV. No video converter that I have in Linux and Windows supports this format. On my Linux system, I have a custom-compiled ffmpeg installation that I thought covered everything. Surprisingly, it did not support AMV. There was a Google Code project titled “amv-codec-tools” that seemed to tailor-made for my requirement. I installed that but the video that it generated was full of artifacts. I had given up.
Today, I tried several Windoze software but all the video files they generated gave a “Format Error” message. I then decided to give ffmpeg-amv another attempt. Apparently, the guys who coded this tool seem to be all-Windows folk. The video does not accept OGV or other new formats. When I tried converting a WMV file with ffmpeg-amv, it produced a AMV video file that played both on Linux and the player without any issues. Totem Media Player does not play AMV but not so with VLC. VLC plays everything.
Here is how you convert any video file to AMV in Linux:
- Compile and install FFMPEG as per the guide at https://trac.ffmpeg.org/wiki/UbuntuCompilationGuide
- Install amv-codec-tools from https://github.com/vsubhash/amv-ffmpeg
- Use your regular FFMPEG executable to convert your existing videos (be they FLVs or MP4s) to WMV.
ffmpeg -i "to-be-converted.mp4" -vcodec msmpeg4 -qscale 1 -r:v 16 -s 160x120 -acodec wmav2 wmv-converted.wmv
- Use ffmpeg-amv to convert the resultant WMV file to AMV format
ffmpeg-amv -i "wmv-converted.wmv" -f amv -r 16 -ac 1 -ar 22050 -qmin 3 -qmax 3 converted.amv

UPDATE: I then wrote a Nautilus Actions Configuration. That way, I can just right-click any video file and then convert it to AMV. I use two BASH scripts so that I can monitor the conversion process in a Terminal window. The first bash script opens the terminal window and executes the second bash script inside it. The script converts the file first to WMV and then converts the WMV file to AMV format. After this conversion, the script deletes the WMV file leaving only the AMV file on the desktop.
amv-convert-na.txt
gnome-terminal -x sh -c "bash $HOME/Scripts/amv-convert.txt ""$1"""
amv-convert.txt
sWMVFile=${2%.*}.wmv
sAMVFile=${sWMVFile%.*}.amv

echo -e "\n\nWAIT: Converting $2 to WMV\n\n"
ffmpeg -i "$1/$2"  -qscale 2 -vcodec msmpeg4 -r:v 16 -s 160x120 -acodec wmav2 "$1/$sWMVFile"
if [ $? -eq 0 ]; then
	echo -e "\n\nWAIT: Converting $sWMVFile to AMV\n\n"
	amv-ffmpeg -i "$1/$sWMVFile" -f amv  -r 16 -ac 1 -ar 22050 -qmin 3 -qmax 3 "$1/$sAMVFile"
	if [ $? -eq 0 ]; then
		espeak "AMV conversion succeeded. Created $sAMVFile"
		echo "\n\nSUCCESS: Converted to $1/$sAMVFile"
		notify-send "AMV conversion" "Converted to $1/$sAMVFile"
		rm "$sWMVFile"
	else
		espeak "AMV conversion failed."
		echo "\n\nFAILURE: Unable to convert $1/$sWMVFile to AMV"
		notify-send "AMV conversion" "Failed to $1/$sWMVFile to AMV"
	fi
else
	espeak "AMV conversion failed."
  echo "\n\nFAILURE: Could not convert $2 to WMV"
  notify-send "AMV conversion" "Failed to convert $1/$2 to WMV"
fi
Use this filter for Caja Actions or Nautilus Actions Configuration: *.3gp;*.asf;*.avi;*.dat;*.flv;*.ogv;*.ogm;*.mov;*.mp4;*.mpg;*.mpeg;*.mp4;*.swf;*.webm;*.wmv

Update (26-10-2018): The amv-ffmpeg converts to an intermediate format if the source video resolution and frame rate is different from that of the AMV container. So, the bash script has been updated to downsize the video in the WMV-creation step. Now, amv-ffmpeg converts directly to AMV. Earlier, the steps were as follows:
ffmpeg -i "to-be-converted.mp4" -qscale 1 -vcodec msmpeg4 -acodec wmav2 wmv-converted.wmv
ffmpeg-amv -i "wmv-converted.wmv" -f amv -s 160x120 -r 16 -ac 1 -ar 22050 -qmin 3 -qmax 3 converted.amv
